What is Firebase Hosting?
Firebase Hosting is a developer focused static web hosting provider that is super fast, secure and reliable. You can quickly and easily deploy your static websites to a global content-delivery network (CDN) with a single command.1
Key features of Firebase Hosting include:
- CDN-backed global content delivery
- Free Automatic SSL certificate provisioning
- Custom (and even naked) domain support
- One-command deploys; one-click rollbacks.
Getting Started
Create a Free Google Firebase Account
Sign in to the Firebase Console and create a new project. You will be prompted to enter a ‘Project name’ and choose a ‘Country/region’.
Install Node js
Firebase CLI work with node js packages (version 0.10.0 or greater), so you have to install node js in your system, so Just visit node js website and get your specific setup file and install it in your system. And don’t forgot to add environment path variable in your system, so you can easily use your favorite command line shell from everywhere.2
Install Firebase
First Time Installation:
Once you have Node.js and npm installed, you can install the Firebase command line tools via npm:
$ npm install -g firebase-tools
# or use sudo (with caution) if required by your system permissions
# sudo npm install -g firebase-tools
This installs the globally available firebase command.
Updating Previously Installed Firebase Tools:
If you have a previously installed version of Firebase command line tools, you can easily update them to the latest version:
$ npm update -g firebase-tools
# or use sudo (with caution) if required by your system permissions
# sudo npm update -g firebase-tools
Now this will install all necessary firebase packages.
If you see any error like an upgrade to v 4.0 in windows machine then just ignore it. After a few minutes all the packages will be installed in your machine.
Now run this command to login:
$ firebase login
Now, your browser will automatically open and it asks to give some permission to Google, so just give it to them.
If you want to deploy your site with continuous integration system such as Travis, you can get your firebase token by:
$ firebase login:ci
Store the output token in a secure but accessible way in your CI system.
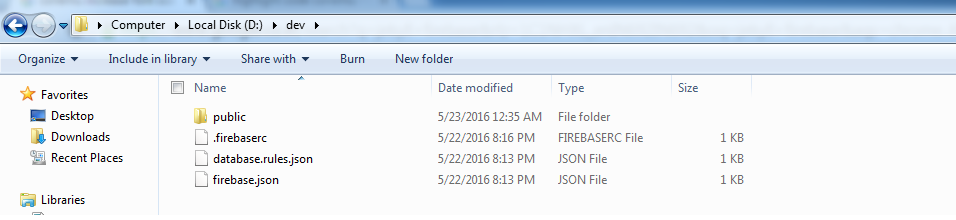
Setup Firebase Project
Just like we use jekyll new to create a new jekyll website, here we do the same thing for Firebase. So choose your favorite location, and go to that directory with cd command.
Now run, this command:
$ firebase init
So just like Jekyll generate many of folder (layout, post, include, config etc) for us, firebase will also generate four things, like this.
Generate Your Jekyll Site
Now come back to your Jekyll website, you can copy your jekyll files to your firebase project’s root directory and build your site to the public folder:
$ jekyll build -d public
Check Your Local Site with Firebase
We all know, we can easily see our jekyll website locally though 127.0.0.1:4000, similarly you can check that public folder with firebase command. Just run this command:
$ firebase serve
Now you can see, your site locally though 127.0.0.1:5000 or localhost:5000 from your browser.
It is really good to see how your site will be live before you deploy it. And don’t forgot to use _draft folder, so jekyll don’t generate it those pages in the public folder.
Deploying Your Site
To deploy your site, simply run the following command from your project directory:
$ firebase deploy
When they successfully deploy it, they will say visit this URL to see your site live. So just visit it, you will see your site is live with their sub domain like https://projectxyz.firebaseapp.com.
Adding a Custom Domain
Firebase Hosting will handle provisioning an SSL certificate for your domain and serving your content over a CDN.
Verification of Domain Ownership
Before setting up your custom domain you’ll need to deploy your site to it’s own firebaseapp.com subdomain. This will give you access to the hosting admin panel, where you’ll be able to see a history of deploys and manage custom domains.
On the Hosting tab of the Firebase app you’d like to associate with a custom domain, select the Connect Custom Domain button.
You will need to update the DNS entries for your domain by adding two TXT entries. The entries are available on the Hosting tab once you start the process of adding a custom domain. Depending on your domain name server host, this verification step may be instant or it may take an hour or more.
Provisioning an SSL Certificate
Once domain ownership is verified, it will provision an SSL certficate for your domain and deploy it across Google’s global CDN. By checking its IP address, it might be the Fastly CDN like GitHub Pages.
Activate Your Domain
The final step will involve modifying the DNS for your domain to point to Firebase’s service. They already write well description about what to do, so just read it.
Deploy with Travis CI
In Travis, you can also install the Firebase CLI and deploy your site automaticly by pull your GitHub repo. For the deploy step, you can access your firebase project by your Firebase Token that stated above.
$ firebase deploy --token "${FIREBASE_TOKEN}"
Refs:
 Related posts in Jekyll
  Better quality of Goog...
  Free SSL with Let's En...